

Warehouse layout design for a small warehouse is the process of arranging receiving, storage, picking, packing, and shipping areas so product moves in one general direction with the fewest steps and the least backtracking. Shipider supports this work by tracking every warehouse location and pallet inside whatever layout you choose, so the floor plan and the system stay in sync as you move racks, add zones, or open a second site.
Most small teams assume a layout problem is really a space problem. It rarely is. A 5,000 square foot facility with a clean flow will outperform a 12,000 square foot facility with a tangled one, because the cost of a bad layout shows up every single day in walking time, mis-picks, and staging chaos. This guide walks through the zones, the flow patterns, and a step-by-step plan you can execute without buying new racking or knocking down a wall.
Why layout matters more when your footprint is small
In a large distribution center, inefficiency gets absorbed by scale. In a small warehouse, every wasted step is a bigger percentage of the day. If receiving and shipping share one dock door, if slow movers sit next to the pack bench, or if returns pile up in the same aisle as inbound freight, the friction compounds order after order.
A better layout does three things at once: it shortens travel distance, it reduces the chance that two unrelated processes collide (a forklift crossing a picker's path, for example), and it makes training a new hire faster because the building itself tells them where things go. None of that requires new square footage. It requires a plan.
The core zones every small warehouse layout needs
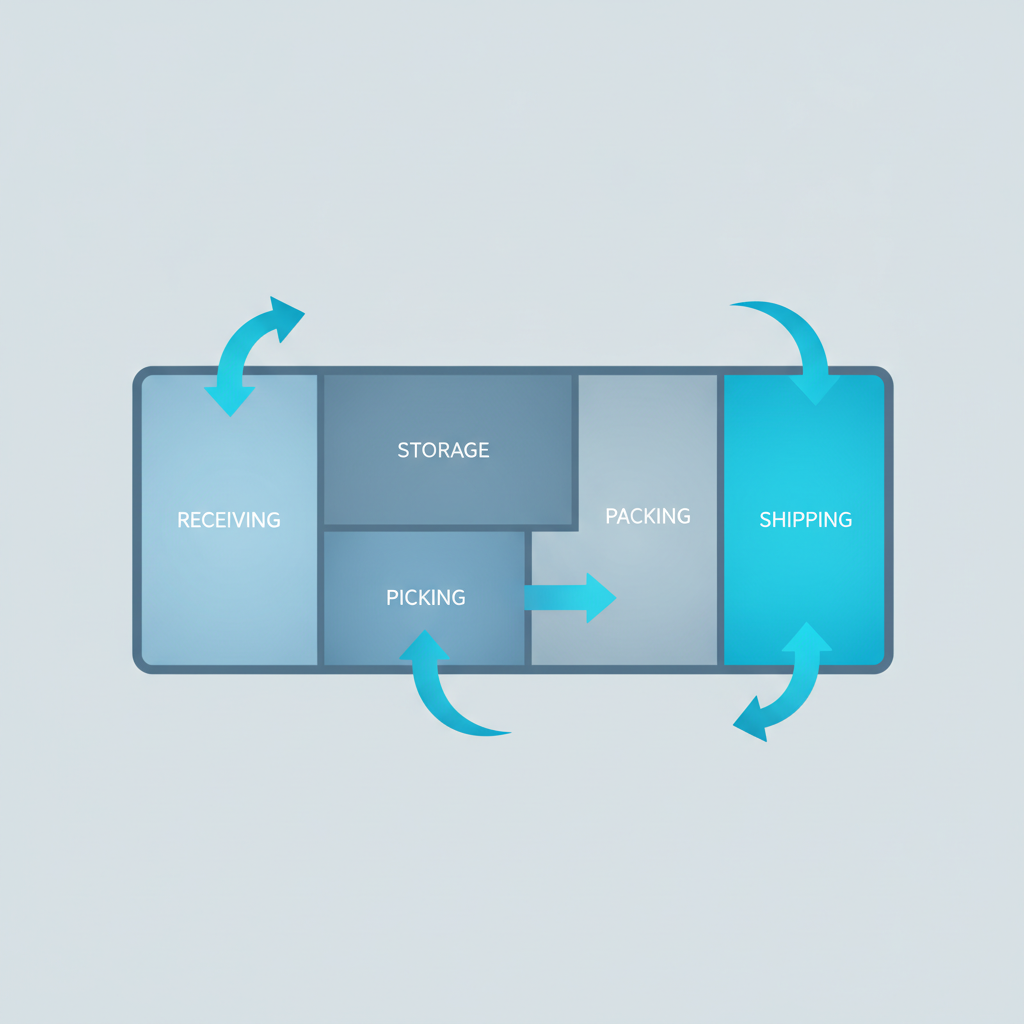
Even a one-room warehouse should have these five functional zones clearly separated, even if only by floor tape or a shelf line.
Receiving and staging
This is where inbound freight lands before it's checked in. It needs enough open floor to stage a full truckload without blocking an aisle. If receiving and shipping share a dock, stagger delivery windows or use opposite ends of the same wall so inbound and outbound pallets never mix.
Storage and putaway
This is the bulk of your square footage: racking, shelving, or bulk floor storage organized by warehouse location so every bin and pallet position has an address. Fast movers belong closest to the picking path, slow movers can sit farther back or higher up. That placement decision is a separate discipline (slotting), but it only works once the physical layout gives you defined, addressable locations to slot into.
Picking and packing
Picking paths should run in one direction wherever possible, ending near the pack bench so totes don't cross back through storage. Packing needs a fixed station with scale, tape, labels, and box stock within arm's reach. Every extra walk to grab supplies is time you can't get back.
Shipping and dispatch
A staging lane for outbound pallets, organized by carrier or route, keeps the loading dock from turning into a scramble at cutoff time. Verification before loading matters here more than almost anywhere else in the building, since a wrong pallet on a truck is the most expensive mistake a warehouse can make.
Returns and exceptions
Small warehouses often skip this zone entirely and regret it. A dedicated spot for damaged goods, returns, and holds keeps exception inventory from quietly merging into good stock.
Common flow patterns for small warehouses
Once the zones are defined, the next decision is how they connect. Three flow patterns cover almost every small facility.
| Flow pattern | Best for | Pros | Cons |
|---|---|---|---|
| U-flow (receiving and shipping on the same side) | Buildings with one dock or one shared loading area | Efficient use of a single dock, shorter building footprint needed | Higher risk of inbound and outbound traffic crossing if not staggered |
| I-flow / straight-through (receiving on one end, shipping on the other) | Long, narrow buildings with two dock areas | Cleanest one-directional travel, easiest to train new staff on | Requires a building shape that supports it, less flexible for growth |
| L-flow (receiving and shipping on adjacent, not opposite, walls) | Irregularly shaped buildings or corner lots | Works with awkward footprints, still keeps inbound and outbound separated | Slightly longer average travel distance than a straight-through flow |
If you're not sure which pattern your building supports, walk the floor and physically trace where a pallet enters and where it leaves. The pattern that already exists, even by accident, is usually the one to formalize rather than fight.
Step-by-step: designing your layout on a tight budget
1. Measure and map what exists. Sketch the building outline, dock doors, columns, and any fixed obstacles. You don't need CAD software, a scaled drawing on paper or a free floor-plan tool is enough.
2. Plot your five zones against the flow pattern that fits your building. Keep receiving and shipping as far apart as the building allows, or stagger their hours if they must share a door.
3. Measure current travel distance for a typical order. Time a picker walking a real order from bin to pack bench. This single number tells you more about layout waste than any theoretical model.
4. Move slow-cost items first. Reposition shelving, tape new floor lines, and relabel locations before you spend money on new racking. Most layout gains come from rearranging what you already own.
5. Assign every location a code. Aisle, bay, level, whatever scheme fits your building, as long as it's consistent and every pallet or bin position has one. This step matters as much as the physical rearrangement, because it's what makes the layout trackable in software rather than just tidy on paper.
6. Re-measure travel distance after the change. If it didn't drop, the layout didn't actually improve, it just moved the mess somewhere else.
For a deeper look at how to place specific SKUs once your zones and locations exist, see our guide on warehouse slotting and location strategy, which picks up exactly where floor-plan design leaves off.
Budget-friendly ways to gain capacity without new square footage
Small teams often assume the next step after a layout redesign is a bigger building. Usually it isn't.
- Go vertical before you go wide. Adding a second shelf level over an existing bay is almost always cheaper than leasing more floor space.
- Narrow the aisles you can safely narrow. Aisles sized for equipment you don't own waste square footage every day.
- Use mezzanine or overhead space for slow-moving or bulky stock that doesn't need frequent access.
- Consolidate partial pallets. A layout redesign is the natural moment to combine half-full pallet positions and free up locations.
- Reclaim staging space with tighter scheduling. If receiving and shipping never overlap, that same square footage can serve both.
How software fills the gaps a layout can't fix alone
A great floor plan gets undone quickly if nobody can find what's actually in each location, or if putaway drifts away from the plan within a few weeks. That's where a warehouse management system earns its place. Shipider tracks every pallet and SKU against the warehouse location it's actually sitting in, not the location a spreadsheet says it should be in, using camera-based barcode scanning that runs on any phone's browser, no scanner guns or extra hardware to buy.
Every receiving, putaway, and pick transaction moves through a two-step maker-checker verification, so a mis-shelved pallet gets caught before it becomes a lost item three months later. And because the system keeps a real audit trail, when someone asks why a SKU ended up in the wrong aisle, you can actually answer instead of guessing. If you're running more than one site, Shipider's multi-site inventory view means your new layout in Warehouse B doesn't require a separate system or a manual reconciliation with Warehouse A.
None of this replaces the physical work of redesigning your floor. But it does mean the layout stays accurate after day one, which is usually where paper floor plans quietly fail. For a broader look at the operational practices that keep a small warehouse running well beyond layout, our warehouse operations hub covers receiving, cycle counts, and picking strategy in more depth.
Frequently asked questions
What is the best warehouse layout for a small warehouse?
There is no single best layout, but a straight-through (I-flow) pattern with receiving on one end and shipping on the other is usually the most efficient when the building shape allows it. If your building only has one dock area, a U-flow layout with staggered inbound and outbound scheduling is the practical alternative.
How much space should I leave for aisles in a small warehouse?
Aisle width should match the widest equipment you actually use, plus safe clearance, not the equipment you might buy someday. Many small warehouses using hand trucks or narrow pallet jacks can safely run tighter aisles than the industry-standard forklift aisle width, freeing up storage space.
Do I need a WMS before I redesign my warehouse layout?
No, layout design comes first: it's a physical planning exercise you can do with a tape measure and a floor sketch. A WMS becomes valuable once the layout exists, because it tracks pallets and SKUs against the new locations you've created and keeps that data accurate as staff and volume change.
How often should a small warehouse revisit its layout?
Revisit the layout any time SKU mix, order volume, or seasonality shifts significantly, and do a lighter review quarterly. Peak season prep is also a natural trigger, since temporary volume spikes often expose weak points in a layout that go unnoticed the rest of the year.
Can I improve my warehouse layout without buying new racking?
Yes, in most small warehouses the biggest gains come from rearranging existing shelving, relabeling locations, separating receiving and shipping traffic, and consolidating partial pallets, all of which cost time rather than money.
Ready to keep your new floor plan accurate the moment it's live? Create a free Shipider account and start mapping your warehouse locations today.
Related reading: Inbound Freight and Dock Scheduling for Small Warehouses
Related reading: Warehouse Task Management: Assigning and Tracking Picker Workloads